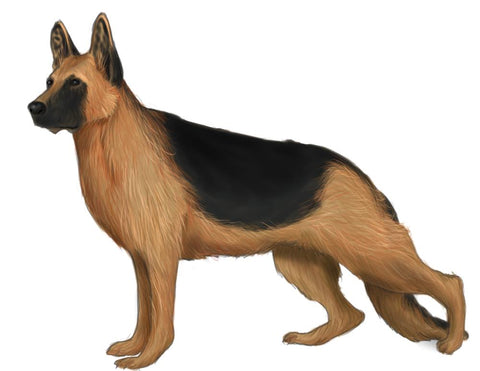
Draw a German Shepherd Step by Step
. The German shepherd, as the name suggests, is a breed of dog that is local to Germany and was trained to herd sheep. It was bred for a simple task at first, but people realized that this dog's potential and intelligence could be applied to far more difficult tasks. It was also referred to as Alsatian, or the Alsatian wolf dog (as a dog from Alsace) in Ireland and great Britain.
Now, here's an example of how to draw one.

- Initially establish the body proportions.
The lower body of a German shepherd is observably lower than the front, this makes the outline of his back slanted than arced (like other dogs'). The body is relatively wide on the front then narrows down noticeably. In this kind of body structure, the semi-conical oval representing the oval must be slightly tilted while the top of the sphere representing the lower body levels with it, creating a slanted alignment. The sphere for the head is relatively small. Set the cross reference line a bit higher than the center.

- Establish the length of the limbs and position the facial features.
Position the limbs. The standing position of a German shepherd usually looks like it's almost in a squat position, and this makes the hind legs appear in a broken 'L' position with the hock strongly protruding on the back. Initially establish the folds and length of the limbs including the tail.
Place the facial feature using the cross reference lines as a guide. The muzzle is relatively thick on the base and then narrows down as it sticks out. the eyes are aligned with the bridge of the muzzle, and the erected triangular ears are diagonally aligned with the eyes.

- Draw the main outline of the figure.
Using the base figure, establish the main outline of the dog while conveying texture. Apply a few subtle ridges, especially on the lower sides and the tail. define the prominent cheekbones and subtle fluffs outlining the neck.

- Clean up the drawing.
Remove the base figures and all the other line markings you no longer need to prepare for coloring.

- Fill the figure with its base color.
The most known bi-colored kind of a German shepherd is the black and tan, with the tan fur covering the most of the body and combined with black markings. Use a light shade of brown like cream brown or dark tan.

- Convey the dimensions using a darker value.
Add a faint layer of shades on the on the edges of the outlines a tone like light bronze. Also apply this shade on the overlapped areas such as the farther legs, farther ear and portions of the tail. convey the contour of the head by applying a shade under the cheek, sides of the muzzle and eye sockets.

- Apply the body markings.
Using a dull kind of black, (charcoal black), make a big saddle-shaped mark on the back that extends far on the side part of the body. This might also extend on the upper part of the tail. the ears and the face is also usually black. Apply a thin layer of black from the outline of the brows and to the entire muzzle, and also behind the ears.

- Apply the small details of the facial features and begin to convey the furry texture starting with the head.
Darken the inner sides of the ears with the deepest shade coming from the ear canal. Use it to describe the concave dimensions and ripples on the ear flaps.
German shepherds have dense fur coat made of thick short strands. To portray this easily, you will use finer lighter hand strokes to make thin short lines. The strands are cast downwards, but make sure that you flow with the contour shape of the dog. Use stronger tones with finer and sharper lines. apply strands of rust brown to a reddish amber brown on the cream brown/tan surface.

- Use lighter and darker values with stronger strokes and finer lines.
For a lighter value, use a paler tone like sandy brown or anything with a hint of lighter cream tone. In contrast to the lighter strands, apply strands using a basic brown tone.

- Elaborate the fur texture even further.
Keep on adding more strands while adjusting the values a bit more. Add longer lines to make the coating appear more natural. Slightly overlap the black areas with the strands of brown tones.

- Add more values of darker and lighter tones on the texture.
Apply a very faint strands of a brighter tone with a leans towards a lighter cream tone, something like a brownish flesh tone or a brownish peach. Add strands of coffee brown, mostly on the areas that already has a darker shade (shadowed areas).

- Add your final retouches and apply another layer of shading.
Reinforce the dimensions of the figure by re-darkening the areas that should appear darker. This would blend all the textures and tones of the drawing with the shape more effectively.

And you're done illustrating a German shepherd.
More examples and tips are available in the book "How to Draw Dogs for the Absolute Beginner". All the steps in each examples are thoroughly explained, so a non-experienced person could easily follow and learn to draw.

For other drawing books about drawing, visit the entire books collection https://l2draw.com/collections
Draw a German Shepherd Step by Step
Source: https://l2draw.com/blogs/news/how-to-draw-a-german-shepherd
0 Response to "Draw a German Shepherd Step by Step"
Postar um comentário